top of page


1/8
Modelling
When generating a design, I frequently use working models to test mechanisms and spot any potential flaws or weakpoints, as well are testing the ergonomicXXX I often find this method of iterative design extremely useful to refine designs, making subtle changes to each model to produce the best possible products XXXX.
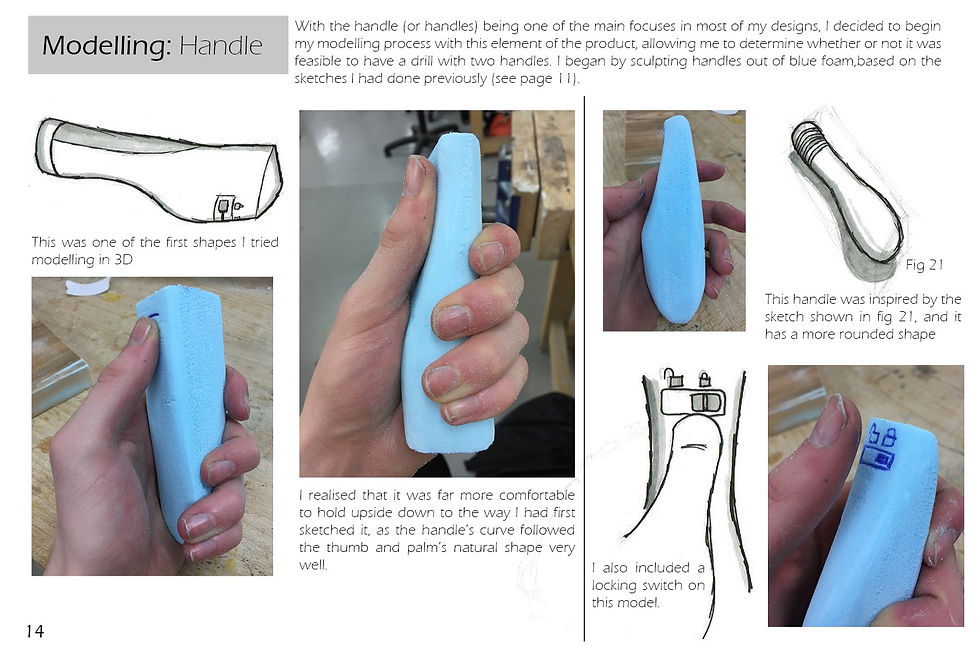
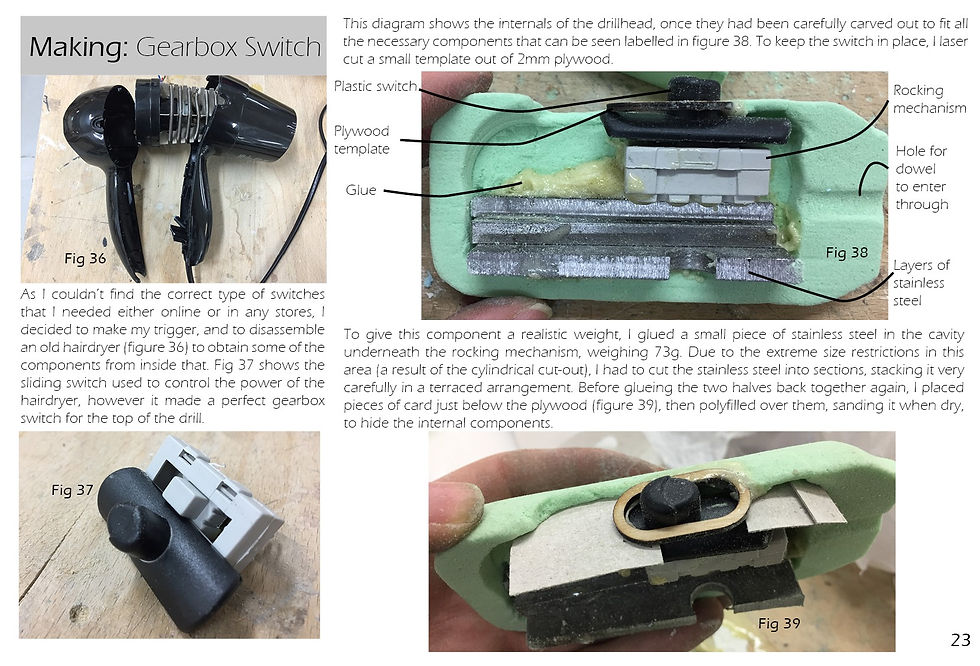
A large element of my human centred design product revolved around creating a handle that is comfortable to hold, so I experimented with a large selection of blue foam models, a material chosen for its cheapness, and ease to shape and mould. The model had to be realistically weighted, with working buttons; the right photo shows how I cut a cavity in the drill head to fit the rocking mechanism, as well as stainless steel weights. Explore this project here.
The dog bowl project for Wilko went through many huge changes throughout the development process, a couple of which have been highlighted here. This also shows how I use CAD, and well as full scale physical models to test mechanisms and rigs, such as the snapfits shown here. The white model was 3D printed, as this was the most accurate way to produce the lips necessary for the fit to work.
A working prototype for a Durabeam torch replica before it's completion. Testing was performed on the model at this stage to ensure that the hinge could be turned smoothly, before disassembling it and spraying the components individually.
The original product
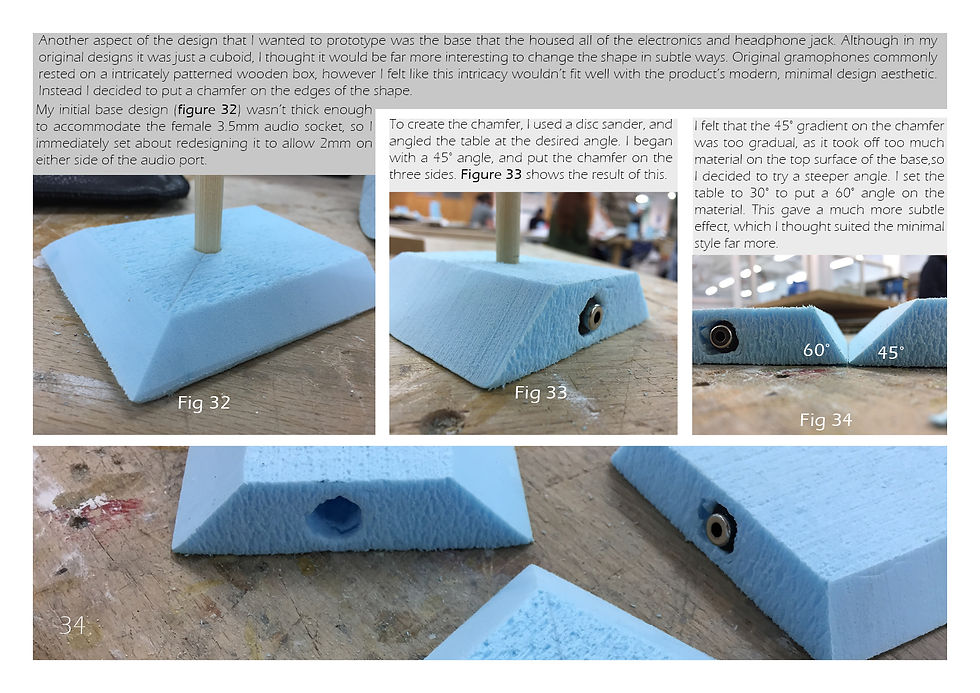
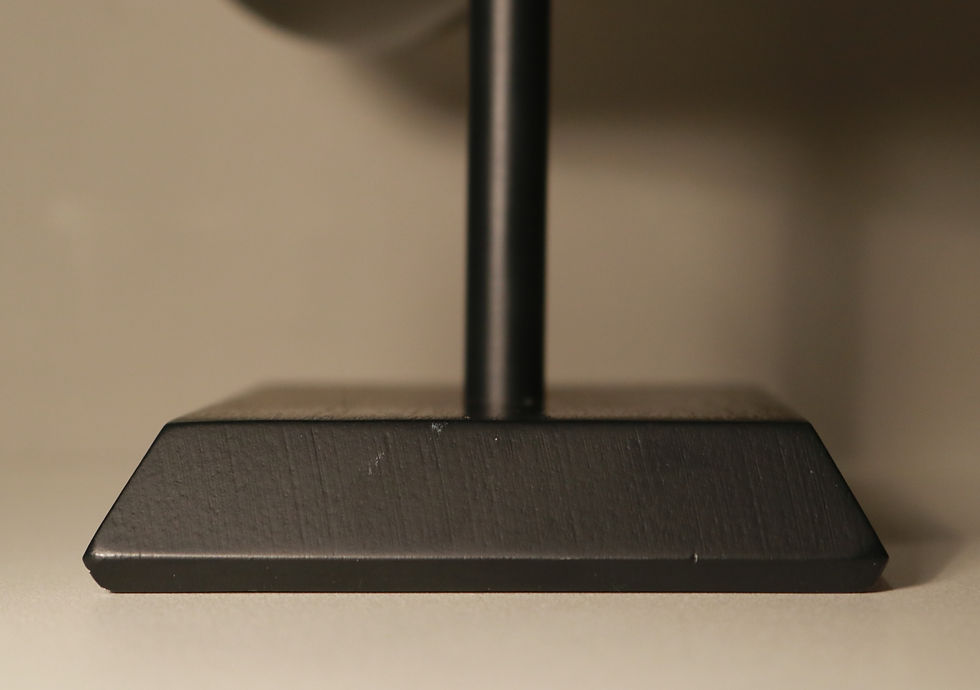
Attention to detail is something I consider to be extremely important in all my designs. In this page I experiment with the structural stability of a product's base, with a chamfer on the edge. The final result can be seen here on the right, with a small reverse chamfer to elevate the base slightly.
1/8
1/8

1/8
1/8
1/8
1/8
1/8
bottom of page